Floor L Sit Tuck. How-to, proper form and tips

Exercise is a preparation for the Floor L Sit. It requires strong shoulders and abs, although other muscles are also involved.
Video demonstration
(excerpt from 'Floor L Sit Progression Tutorial by Antranik' by Antranik DotOrg)
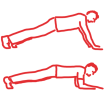
How to and step by step instructions:
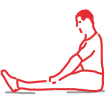
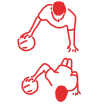
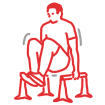
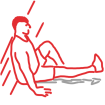
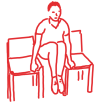
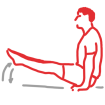
- Sit on the floor, legs straight and feet together.
- Put your hands on the floor, near the hips.
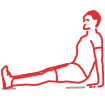
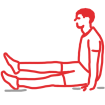
- Press your shoulders down with your arms straight so that the hips stays of the ground.
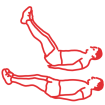
- While pressing shoulders down, your head should be as far as possible from the shoulders.
- Raise your knees to the chest so that your feet stay off the ground.
Hints & tips:
- Key points are shoulders and abs, ensure they are prepared.
- Other muscles are also involved, this is a complete exercise.
- When starting, to be able to hold the position for a few seconds is already a great exercise.
- Exercise is easier in a hard ground such as rock or cement, opposite to a soft ground such as a grass field.
Benefits:
- Overall strength, focus on shoulders and abs.
Counting & gamification:
- Count the seconds you can hold, accumulating in a period (session, day, week).
- Set an accumulated goal for a workout session, say 60 seconds, and do the necessary repetitions to reach that goal.
Muscles worked and body parts involved:
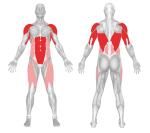
Muscles: Core & Upper body
Primary muscles: Shoulder, Triceps, Abs, Lats
Secondary muscles: Obliques, Lowerback, Hip Flexor, Quads
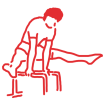
Floor L Sit Progression

4. Floor L Sit Tuck


Muscle: Core and Upper body
Collection: L Sit Friendly

Category: Bodyweight

Same exercise, different set:


Floor L Sit Tuck